You are here
Sharing is Caring: Using OneDrive to Share Files
OneDrive is Microsoft’s cloud storage service where you can update, store, share, and sync your files from anywhere. All Pitt students, faculty, and staff have access to 5 terabytes of storage through their Microsoft 365 account while they are enrolled or employed at Pitt.
One of the most convenient features of cloud-based storage is the ability to share important files in a safe, secure way (no emailing required). By sharing a file, you can collaborate on files and ensure everyone is reviewing the same version. If you’re new to OneDrive, or used to sharing in Box or Google, it may seem a little confusing to share files in OneDrive. But sharing is easy once you know how to do it.
Locating OneDrive Files to Share
You can get to your OneDrive account via the desktop app, via the web app, or directly within Microsoft 365 apps. Once you locate the file and select Share, the Share Menu will open.
- Desktop app: Go to File Explorer (Windows)/Finder (Mac) to see the files in your OneDrive account. Right-click on the file(s) or folder(s) you want to share and select Share from the pop-out menu.
- Web app: Log into Microsoft 365 at portal.office.com. Click on the App Launcher (the square of nine dots in the upper-left corner) and choose OneDrive. (Note: the App Launcher is accessible from any Microsoft 365 online app, including your Outlook email account.) You can also log into OneDrive directly at https://onedrive.live.com.
- Microsoft apps: If you’re working in a Microsoft app, like Word, Excel, or PowerPoint, you can share a file from the app. Open the document, click on File from the ribbon, and select Share.
Selecting Who to Share the File With
Deciding who to share a document with seems simple enough, but depending on how you share the file, you’ll be able to select different access and privacy settings. You can also share a file multiple times, selecting different settings for different people. For example, if you’re working on a policy document, you can share the draft with subject matter experts and give them the right to Edit or Review the file. Then, once it’s finalized, you can make the document available to anyone who has the link, but only allow them to View it.
There are several recipient options:
- Specific people – Enter as many people as you like, one name at a time. When you begin to enter their name or username, a list of potential recipients will appear to help you quickly find the right person. Press Enter after typing in each person or click a name from the list.
- Anyone at University of Pittsburgh with the link – Make the file available to anyone with Pitt credentials, including students, faculty, and staff. You can post the link in a public forum (such as a website or Teams channel), or share the link as needed.
 Anyone with the link – Use this option for documents that can be shared publicly, for example on a website or in marketing materials. It’s also the setting that is needed to share broadly with individuals outside of Pitt, including those at UPMC.
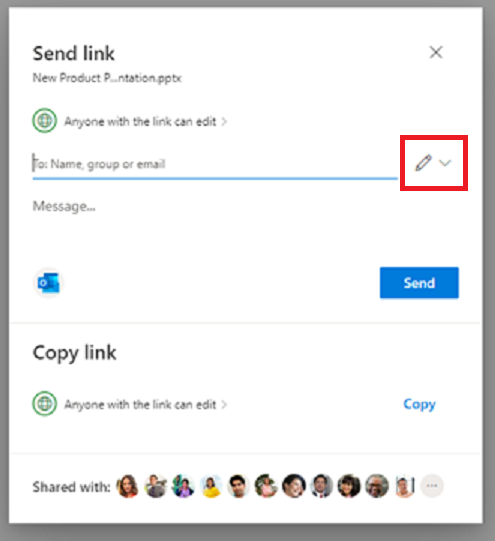
To select individual recipients, type their names/emails in the text entry area and press Enter. (When you begin to enter info in the box, a list of potential recipients will appear to help you quickly find the right person.)
Alternately, click the access group listed under Send link or Copy link to open the Link Settings menu to select one of the groups described above (or to change the settings for those with existing access to the file).
Sharing Settings
Type of Access
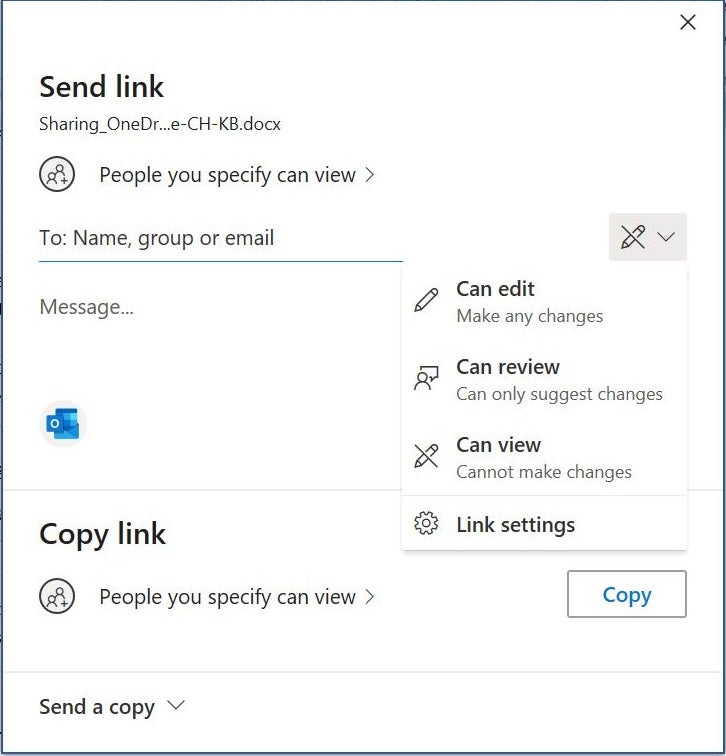
Click the drop-down arrow beside the pencil icon to select the level of access the recipients will have.
- Can view (default) – the person can open and look at the document, but not make any edits.
- Can edit – the person can change the document in any way they choose.
- Can review (Word files only) - the person can insert comments or make tracked changes that the owner can decide to accept or reject. This is the recommended option to maintain control over content and let everyone see the changes that are being made.
Other Settings
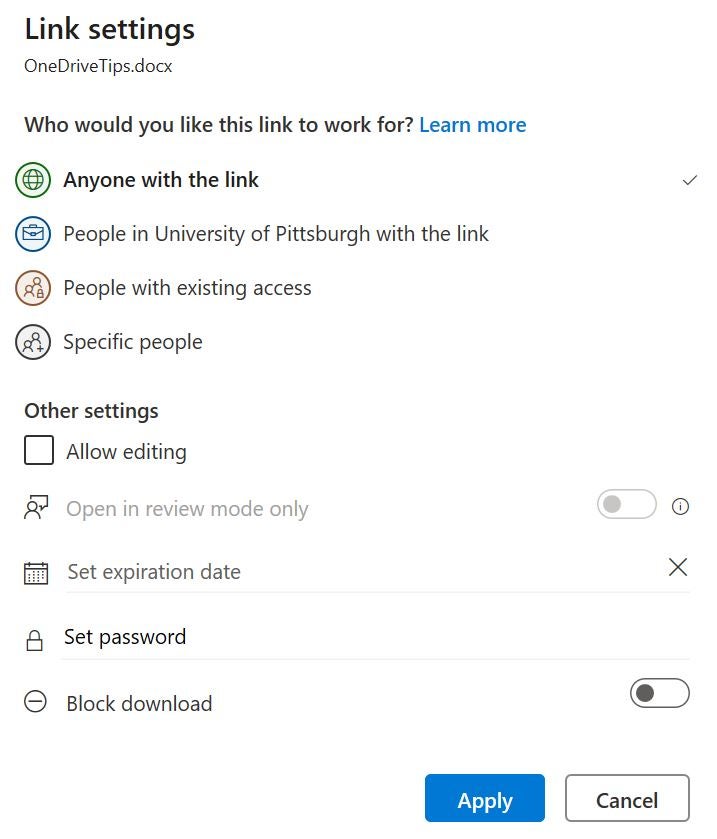 When selecting Anyone with the link or People in University of Pittsburgh with the link, you can choose several other access and privacy restriction.
- Block download (Anyone, Anyone at Pitt) – Prevents people from downloading the file to their device. This is helpful for files with confidential information and prevents people from editing their own copy of the file.
- Expiration date (Anyone) – Appropriate when there is a deadline for providing feedback or a date after which the content no longer applies. You might use an expiration date for an application with a deadline, or to limit the comment period of a draft policy. The link automatically disables after the deadline passes.
- Set password (Anyone) - Helps ensure that only authorized people can access the file, which is particularly helpful if the link is shared more broadly than you intended. This can also be used if you want to post the link on public web page but want people to contact you for the password.
Once you have all of your settings configured, click Apply.
Sending the File or Link
If you are sending the file to specific people, add a personal message under Send Link. This helps users know what the file is for and why you’re sending it to them. Then, click Send. OneDrive will send the recipient(s) an email with your message included and a link to the file. The file will also appear in their OneDrive web app under “Files shared with me”.
If you are sharing the file with groups of people (Anyone with the link or Anyone at University of Pittsburgh with the link), OneDrive will not generate a mass email. Instead, you must use Copy Link to post the direct link to the file. Just press the Copy button and then post the link in a Teams channel, include it in an email, or post it on a website, chat board, or social media post.
Share and Share Alike
Sharing has never been easier with OneDrive. For more information on sharing and using OneDrive, Pitt IT offers general information about OneDrive as well as a blog on Getting the Most from OneDrive and a OneDrive Security Guide. You can also visit Microsoft’s page regarding sharing documents for more details. Lastly, the Technology Help Desk can help you with any and all specific questions. Now, get sharing!
– By Karen Beaudway, Pitt IT Blogger