You are here
A Few Notes About OneNote
Thanks to Microsoft OneNote, gone are the days of having random notepapers strewn across your desk, a collection of binders on your shelf, or lugging a notebook to meetings. A OneNote digital notebook saves and syncs all your notes as you work—and is available from any device using the web, desktop, or mobile app. All your notes are always with you, so you can stay on top of your to-do list, organize all the things you need to remember, and flesh out new ideas. By learning just a few tips and tricks, OneNote may just become your next favorite app. (Next week, we’ll discuss classroom notebooks to help take your courses to the next level!)
Learn the Basics
![]() Before you ditch your paper notebooks and binder tabs, a quick review of OneNote basics is in order. First, to access OneNote, just open the desktop or mobile app on your device or log into Office 365 and select OneNote.
Before you ditch your paper notebooks and binder tabs, a quick review of OneNote basics is in order. First, to access OneNote, just open the desktop or mobile app on your device or log into Office 365 and select OneNote.
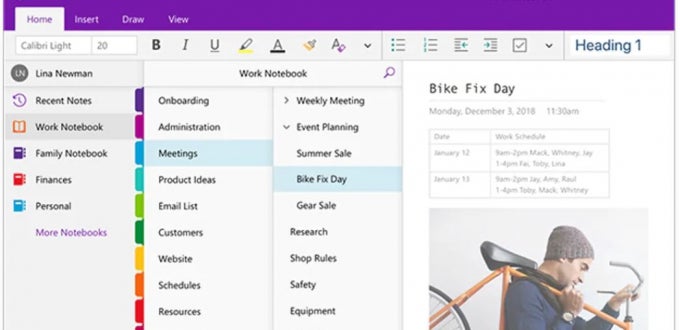
 Once you log in, you’ll see a list of your current notebooks. Just select a notebook or click the Notebook icon to see all available notebooks. To create a new notebook, click + New notebook. If you don’t have any saved notebooks, OneNote will start a new one when you log in.
Each Notebook is organized into sections and pages similar to a three-ring binder with section dividers.
To get started, click Add section and/or Add page. Then, just start typing or you can insert images and files onto a page. Pages and sections can be in any order you choose by dragging them up or down. Each item on a page is in its own content box, which you can resize or move around.
Take It to the Next Level
Voila! You now have an online notebook for jotting down notes during a meeting, organizing info related to a project, or keeping track of details for an ongoing responsibility. You’ll love its anywhere, anytime, any device convenience. Plus, unlike keeping notes in many separate files or in one long document, OneNote lets you easily organize and switch between note pages like an organizing pro! Here are some tips and tricks to put OneNote firmly into your Favorites category.
1. Share and Share Alike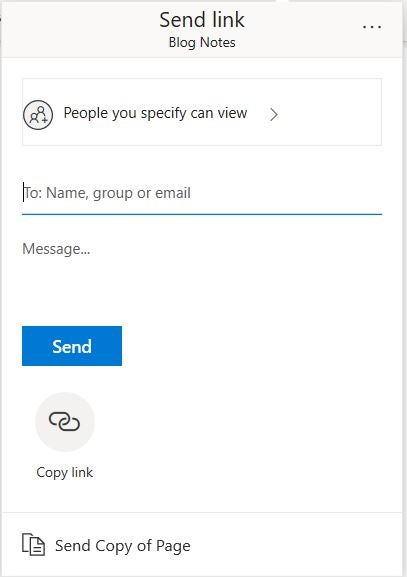
OneNote makes it really convenient to collaborate with others. To share a notebook, click on Share in the upper right corner. Enter the email or name of the people you want to share it with, write a message, and click Send.
If you click the share category (set to “People you specify can view >” by default), you can edit the settings, including letting others edit the notebook. If you just want to give someone a snapshot of your notes, send them a static copy of the page.
Next level tip: You can share only a specific section or page. Just right-click on the name of the section or page from the panels on left and select Copy link to page. Then, just paste the link into an email or chat message to the people you want to share it with.
2. Integrate OneNote and Teams
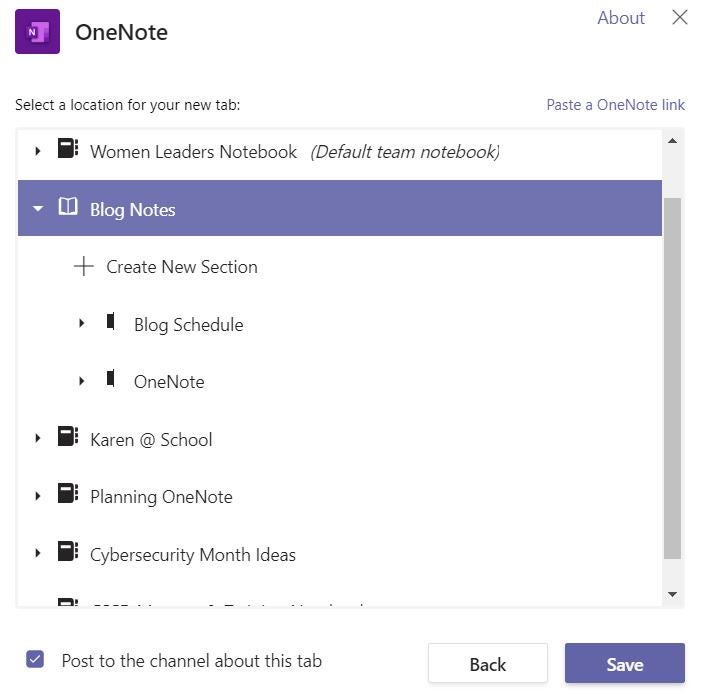 If you use Teams, integrating OneNote and Teams is absolutely key. When you start a new notebook directly in Teams, it automatically gives the members of that team View/Edit rights, but you can also share an existing notebook with the team. To include a OneNote notebook in Teams, click + at the top to create a new tab. Select the OneNote app and click to create a new notebook or select and existing notebook.
Next level tip: Match the notebook sections with the team channels. First, go to the Team’s home/general page and add a tab for a new or existing notebook. If you have sub-groups (aka – channels) in your team, go into each channel and add a OneNote tab. Instead of clicking on the name of the notebook, click the arrow beside the notebook name and create/choose a section. Sections should have the same name as the channel (e.g., “CHANNEL-NAME Notebook”) so you know what the section is for whether you access it via OneNote or in Teams.
3. Write or Draw
OneNote lets you draw and write on pages, as well as type text. This is especially useful for things like marking up an image, labeling different parts of a diagram, or marking edits to someone’s work. Writing more than a few notes with a mouse is a pain, but using a stylus on a tablet can be more convenient than typing with the screen keyboard. You can write and draw with a mouse, stylus, or your finger (on a touchscreen). Fortunately, the Find feature will search any written text, too!
Next level tip: You can convert written text into typeface and drawn objects into clean shapes. If your handwriting isn’t great or you want to format written text, you can lasso hand-written text into typeface text … literally. From the Draw menu, select the lasso tool and trace it around the drawn text and then click on Ink to Text. From there, you can edit and format the text as you choose. Similarly, your hand-drawn shapes may look messy if you’re not an experienced graphic artist. After you pick your drawing tool, click Ink to Shape. This tool will resolve your shapes into smooth curved edges or straight lines with clean angles, so your squares and circles (or ovals and hexagons) are perfect.
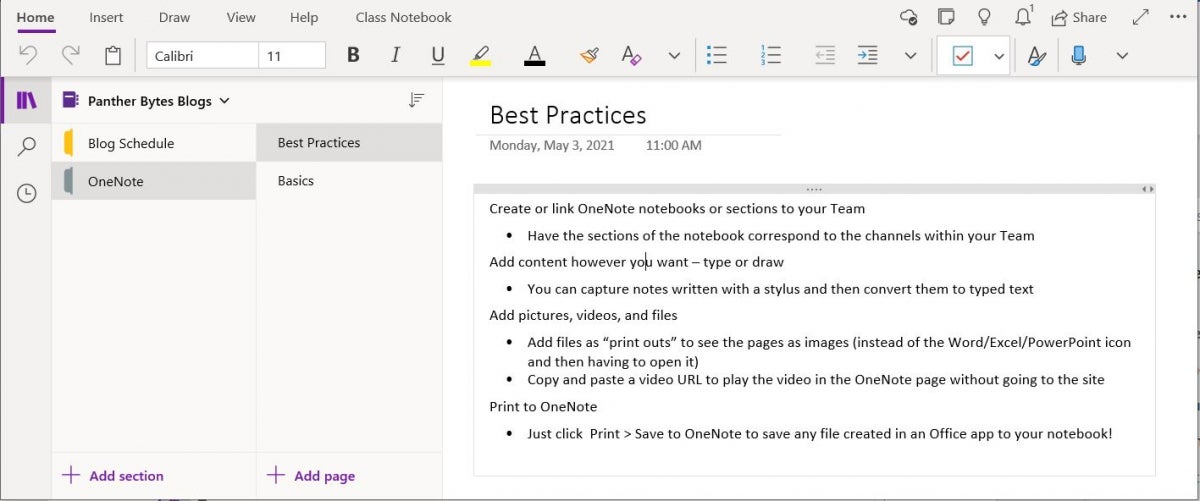
4. Scrapbook With Pictures, Videos, Files, and Tables
OneNote is as much a digital scrapbook as it is a digital notebook. You can add files created in other applications, tables, pictures, and audio or digital files. Just click the Insert tab and pick the type of content you want to add. Even easier, you can drag and drop content into your notebook from File Explorer or copy—paste content. OneNote automatically recognizes the content. For example, a section of a table copied from Word or Excel will display as a table.
Next level tips: This feature—incorporating nearly any kind of content—is such a OneNote differentiator that you get four next level tips in one section!
 Insert files as “print outs”. When you insert a file onto a page, you have the option to insert it as a print-out. This displays the actual content, rather than just an icon, so you don’t need to open the file to see it.
- Create a table on the fly. To create a table, just start typing. When you press TAB, it will transform the text into a table, adding a new column. Need 6 columns – just press TAB six times! Then press ENTER to start another row. You can still use the Table tab to edit/format it.
- Insert a video by just pasting the link. OneNote will both add a clickable link and insert a video player so you can just press play instead of leaving the page or opening a web browser to view it.
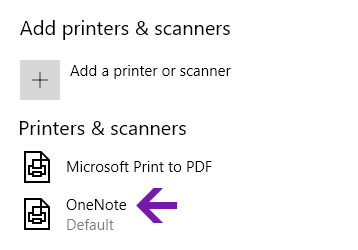 Print to OneNote. Another way to add content to OneNote is to print it directly to OneNote from another Office app. Just select File > Print and select OneNote as the printer. It will add the file as a print-out to the section/page you select.
What Comes Next
Now that you’ve learned all about using OneNote to maximize your productivity, put it into practice in your own work. Add OneNote notebooks to your Team’s, and create notebooks just for you. Next week, Panther Bytes will talk about OneNote for Education, and how you can use classroom notebooks in teaching and learning!
-- Karen Beaudway, Pitt IT Blogger