You are here
Teaching and Training with OneNote Class Notebooks
Last week, I extolled the virtues of Microsoft OneNote, an online note-taking app that can make you the Marie Kondo of online organization. This week, I’m digging deeper with OneNote Class Notebooks for use in teaching and learning. While instructors use the Canvas Learning Management System for credit-bearing academic classes, those engaged in training or extra-curricular learning opportunities may find that OneNote Class Notebooks are the perfect way to help your students learn, retain, and apply the information you cover!
Class Notebooks 101
So what’s the difference? A standard OneNote Notebook is designed to organize your work. It allows you to type text; hand write or draw; and add files, images, links, video and audio clips, and more. Then you can move elements around, resize them, or add them to different pages. It’s like a digital work scrapbook, except that you and anyone you choose to share it with can access it from any device.
A Class Notebook is like a supercharged Notebook that is designed specifically to organize course content for both instructors and students. Each page works just like a standard OneNote page, but a Class Notebook automates sharing pages with students, providing individual student workspaces that you can monitor, and creating spaces for collaborative work.
Mine, Yours, and Ours
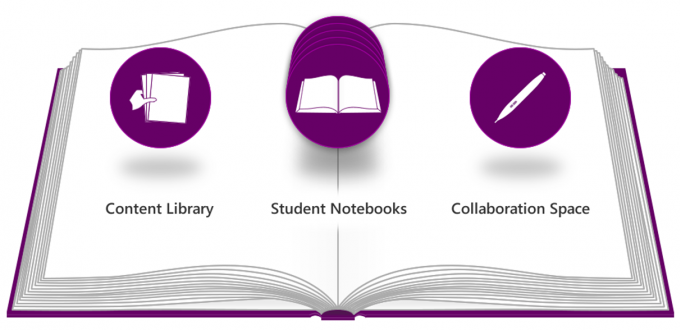
Class Notebooks are created with four main sections: Content Library, Collaboration Space, Student Notebooks, and Teacher Only.
- Content Library: Content library pages can only be created and edited by instructors, but all students can view them and copy them to their student notebook (where they can take notes on it). This is the main section where you will add course content, including lesson or module presentations, handouts, reference guides, class information, etc.
- Teacher Only: This section is for content that only instructors can see. This is a good place to create to-do lists, do lesson planning, document things that happened in class, create messages for co-instructors, or add other content to help you stay organized.
- Collaboration Space: Collaboration pages can be viewed and edited by both instructors and students. It’s a great place for interactive, collaborative work. For example, you could ask training participants to list their biggest obstacle or challenge. Or you could assign students to groups and give them access to a Collaboration Space section to do their work.
- Student Workbooks: OneNote will create an individual notebook for each student you add to the Class Notebook. Student will only see their own notebook, but instructors can see and edit all of them. You can add assignments, quizzes, etc. Students can take notes or complete individual work, and instructors can then review/grade it. Students can also copy pages from the Content Library or add new pages of their own.
Take Note: 10 Tips to Know
OneNote Class Notebooks are a great way to organize and distribute class content. Here are some tips and tricks to help you get the hang of it.
- Get Training: OneNote Class Notebooks aren’t hard, but they aren’t necessarily intuitive to figure out either. On-demand training will help. A lot. Trust me. There are many good videos online. I recommend the training videos from Microsoft or the LinkedIn Learning course, OneNote Class Notebooks for Educators. Whatever learning resource you access, be sure it covers OneNote for Windows 10/Office 365. (OneNote 2016 is significantly different.)
- Lock the Collaboration Space: Unfortunately, people can hijack any platform that allows user-generated content. So monitor the Collaboration Space for inappropriate content. Even better, lock it until you’re ready for students to use it, and then relock it when the collaboration period is over. To lock or unlock this section, go to Class Notebook tab > Manage Notebook.
- Students Can Save a Copy After the Class: On the last day of class, have students go to their list of available Class Notebooks, right-click on the title, and select Save a Copy. They can save the entire Notebook (their student Notebook plus the content library) to their Pitt OneDrive account or a personal Microsoft account for reference after the class is over.
- Minimize Your File Size: Depending on how many files you add and how many students you have, you Notebook can get really big really fast! Here are a few ways to keep it under control:
- Save PDF files as “Minimum Size” and save images in a small web-display size (72 dpi).
- Clear the Recycle Bin every so often of unneeded deleted files and pages.
- Delete student content at the end of the class. Then, you can keep the class content to reuse for another session. (Tip: keep one student notebook for reference.)
- Add Additional Teachers: If there is someone else who can evaluate assignments or successful completion of the training (e.g., for certification purposes), add them as a teacher so they can review student notebooks.
- Distribute Content: Use the Class Notebook > Distribute Page button to copy a page into individual student notebooks. You can add it to all notebooks, select individuals, or to a pre-determined group if you have different categories of students. Distributed a page you didn’t mean to? Just click Distribute Page > Delete Page to bulk delete it from student notebooks.
- Provide Audio Feedback: I love giving individual feedback via audio clip instead of typing it all out. Just go to Insert > Audio. It immediately starts recording; just click Stop when you’re done. It will add the audio file with a play button and a time/date stamp. Super easy and more personal.
- Add Links Beside File Printouts. When you insert files as a printout, any in-text links don’t work. People can click on the icon to open the original file to access them, but I think it’s easier to just add a text box with the link right beside that spot in the image.
- Insert File Printouts as a Background. OneNote allows you to annotate and provide feedback directly on the content. But if the image gets moved or you accidentally select the image instead of the annotation, things won’t line up correctly. Inserting printouts as a background image locks the element so it cannot be selected or moved. Just insert the file as a printout, and then right-click on the image and select Set Picture as Background.
- Review Student Work: There is no need to navigate to each student notebook to find and review their work. Instead, just click on Review Student Work, pick the appropriate page, and click on each student’s name to go right to the page. The list can be sorted by first or last name.
Take a page out of the Office 365 book and see how Microsoft OneNote Class Notebooks can enhance your learning and development offerings.
-- By Karen Beaudway, Pitt IT Blogger