You are here
Hoteling: Workspace Reservation in Outlook
For departments, the Workspace Reservation System (Condeco) is now available and lets you search and book workspaces and meeting spaces, check availability, manage reservations, and locate colleaguesTo request access to the Workspace Reservation System, please contact the Technology Help Desk at 412-624-HELP (4357) and a ticket will be created. Please allow five business days for processing. |
With hybrid (on-campus and home-based) working options now available to University of Pittsburgh faculty and staff, many departments are using the “hoteling” concept: providing sharable workspaces – such as cubicles, offices, or other common working spaces – for use when an employee is working on-site instead of at-home.
This page contains instructions on how to access and reserve departmental workspaces or resources via Microsoft Outlook. The list of available workspaces or resources will have been entered into the system by your departmental RC administrator, who can provide the details of your available workspace calendars’ names.
In this document we will use the Office 365 version of Outlook and the Pitt IT Help Desk calendar group as examples. Workspace names will follow [Department - Building - Floor - workspace type & number] as a naming format – for example: Pitt IT – Helpdesk – Cubicle 2 and Pitt IT – Helpdesk – Cubicle 4.
- Note: If you are using the Outlook client on either Windows or Mac, the steps outlined below can generally be replicated. The interfaces may be slightly different in each operating system, but the functionality is generally similar. If you have questions, please contact the Pitt IT Help Desk for assistance.
Reserving a Workspace/Resource in Outlook
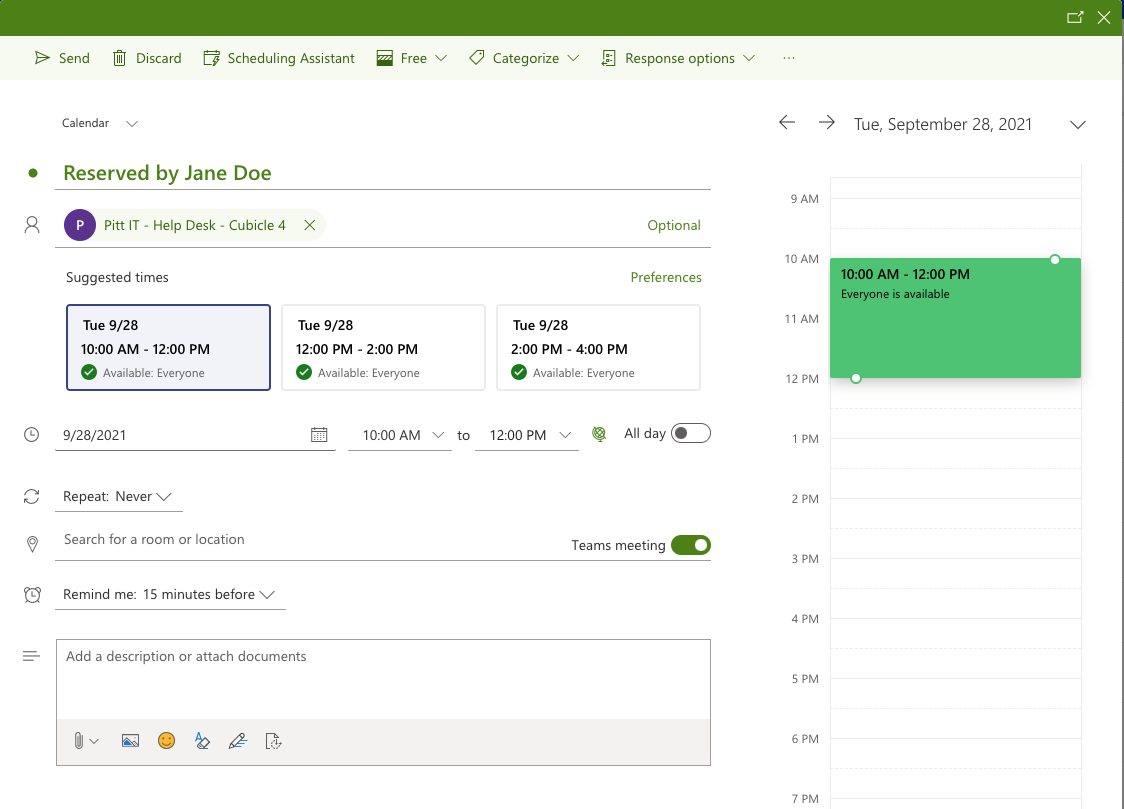
Reserving a workspace/resource is just like inviting a person to a meeting: you can select an individual workspace/resource calendar to see its availability, or you can select the group name to view availability of all workspace/resource calendars at once.
To reserve a workspace or resource:
- Create a meeting on your calendar for the desired date and time.
- Invite the workspace/resource you want to reserve.
Important: Use Invite attendees for this, not Search for a room or location. - Enter a Subject to denote the reservation, for example: “Reserved by Jane Doe.”
- Enter the start and end times.
- Change your status from Busy to Free.
Note: This is so that your personal calendar won’t show you as Busy or Unavailable in the system – only the workspace that you reserved will appear in the system as busy. This allows you to be available to schedule meetings, etc. during your hoteling time. - Click Send.
- When a workspace/resource is successfully reserved, you will receive an email noting that your reservation was accepted.
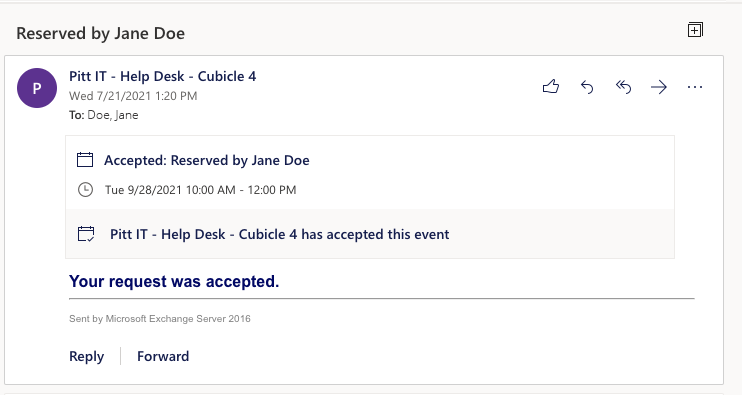
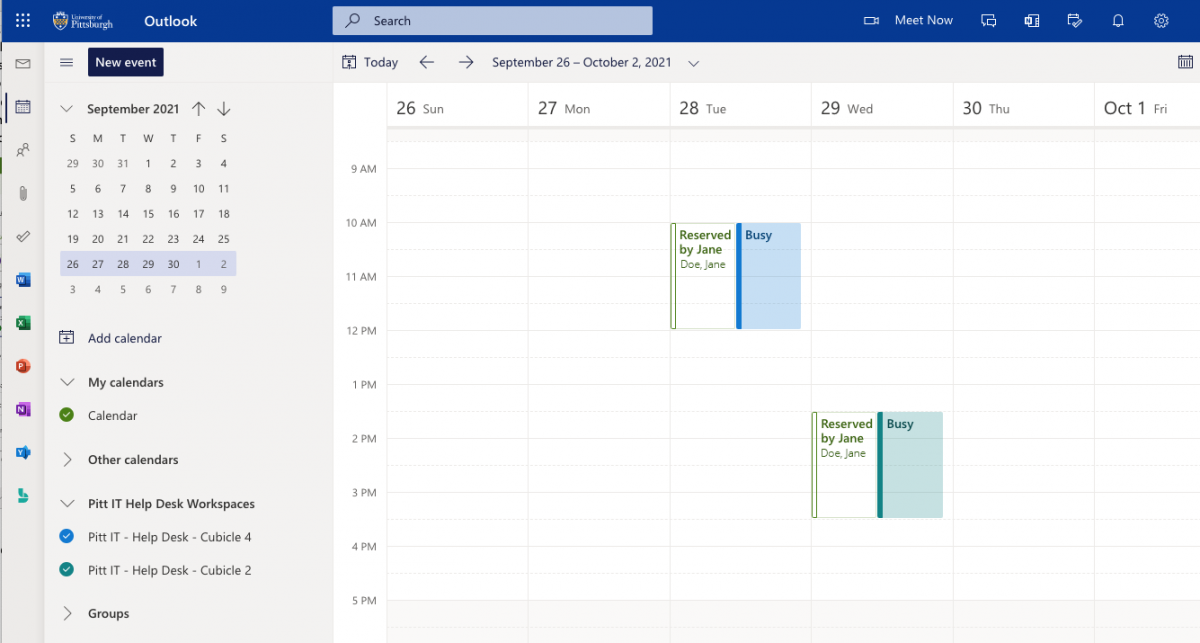
- The workspace(s) will appear in your calendar view as “Busy.”
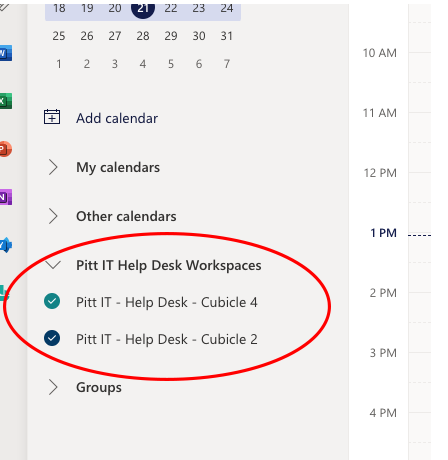
Adding a Workspace or Resource to a Calendar Group in Outlook
You can add the workspaces you reserve most frequently to Calendar Groups in Outlook to make them easier to find. To do so, complete these steps:
- Open a browser window and log in to Office 365 using your University of Pittsburgh credentials.
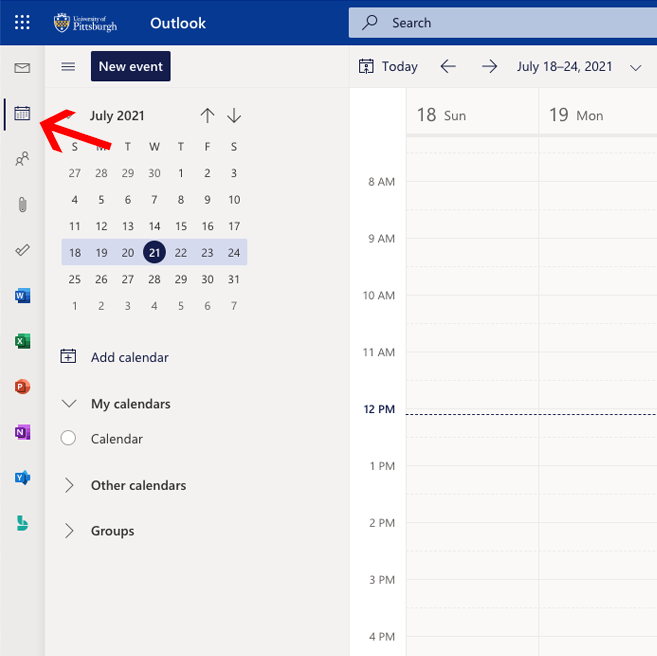
- Click on the Outlook app icon to launch it, then navigate to the Calendar tab by clicking the calendar icon (located on the left-hand side of the browser window).
- Hover your mouse’s cursor over My calendars, click the ellipsis […], then click New calendar group.
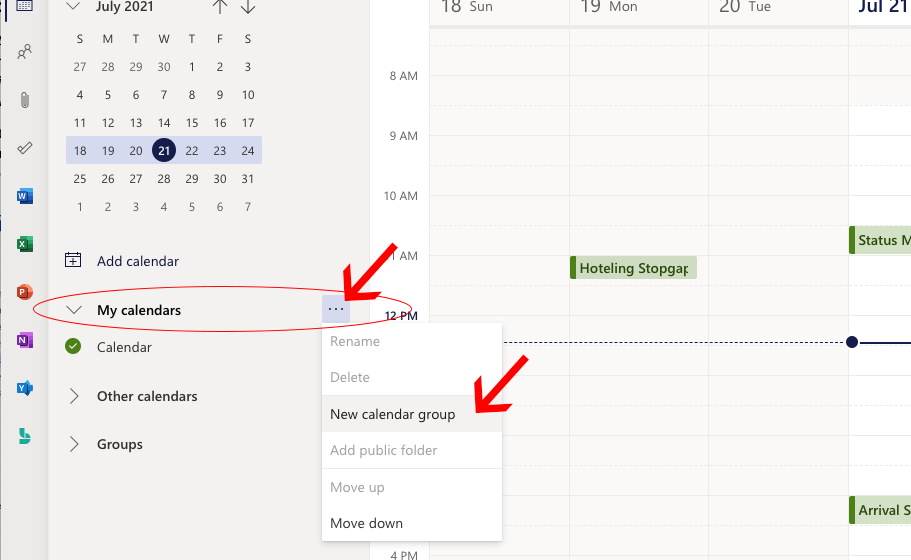
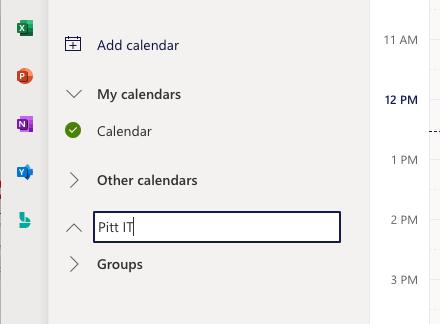
- A new group will appear in the left side panel of the window. To save your new calendar group, type a name (in this example, “Pitt IT Help Desk Workspaces”) and press Return.
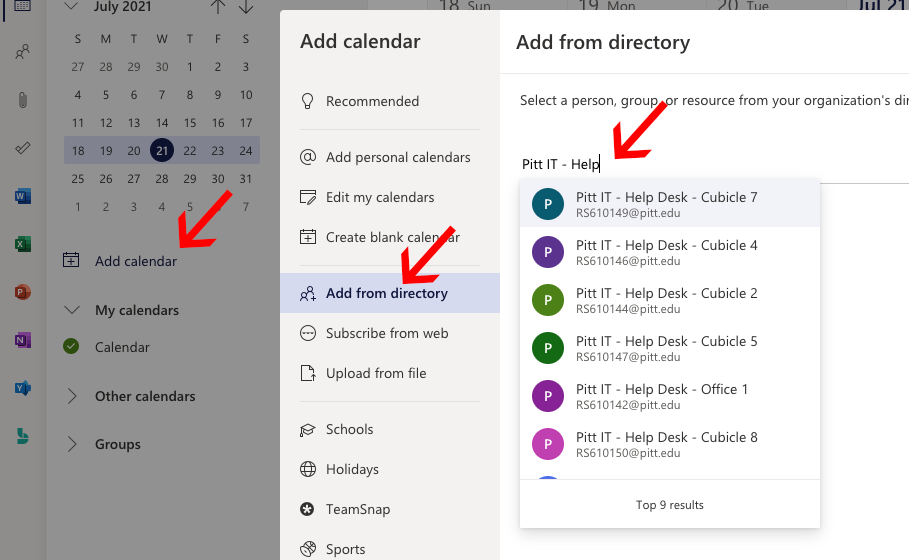
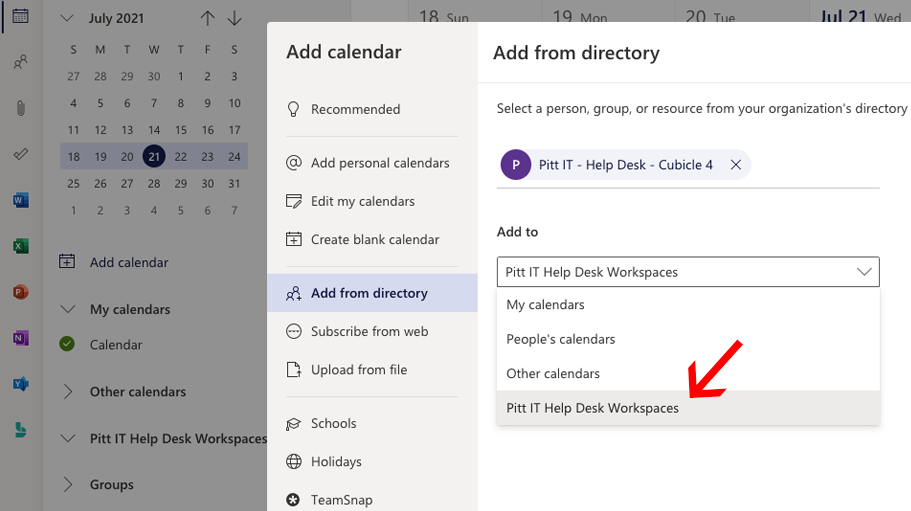
- Click Add Calendar. In the pop-up window that appears, click Add from directory, and begin typing the name of the departmental workspace you want to reserve where indicated. A list of workspaces will appear in the dropdown.
- Select a workspace and click the Add to drop-down box. Select the calendar group you just created, and then click Add. The workspace calendar will appear under your calendar group.
- To add additional workspaces to your group:
- Office 365 and Outlook Client on iOS: Begin typing the name of the departmental resource again (as in Step 5 above) and select an additional workspace.
Note: You will have to add additional workspaces individually in Office 365 and the Outlook client on iOS.
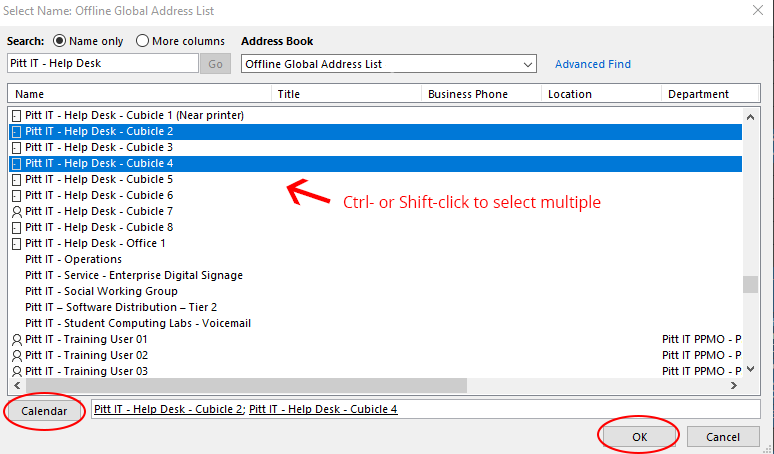
When you are done adding workspaces, close the Add from directory window. - Outlook client on Windows: You can add multiple workspaces at one time to your calendar group. Simply Ctrl- or Shift-click to select additional resources from the list you accessed (as in step 5 above), click Calendar, then click OK.
- Office 365 and Outlook Client on iOS: Begin typing the name of the departmental resource again (as in Step 5 above) and select an additional workspace.
- The resource calendars you added appear on the left side of the window.