Overview
Microsoft Outlook provides a way for users to manage and organize their email using rules. A rule is a condition or action set by the user to organize mail messages either sent or received by the user. For example, rules can be applied to save messages from a distribution list to a specific folder or to move messages with certain subject words into a folder. This document explains how to create rules with all versions of Microsoft Outlook: 2003, 2007, 2010, and 2013.
Detail
To create a rule, launch Outlook. You must be viewing mail to configure rules.
Creating Rules
Outlook 2003 & 2007
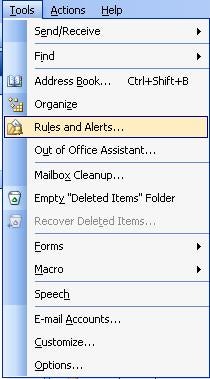
- From the menu, select Tools, and then select Rules and Alerts.
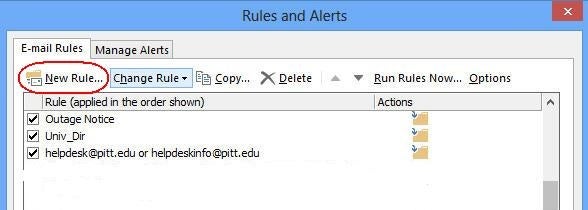
- Click on the New Rule button. Proceed to step 3 in the following section.

Outlook 2010 & 2013
-
From the File tab, click Manage Rules & Alerts.

- Click New Rule.
- The Rules Wizard will appear on the screen. The rule can either be created from a generic template or from a blank rule. To create a rule to place messages from someone into a particular folder, select the first template listed under Stay Organized and click Next. This document will explain the process when using a template.
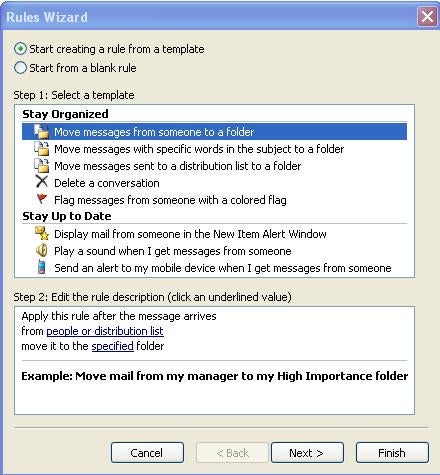
- In step 1, select all the conditions that apply to your rule by clicking the boxes next to each condition. The condition can be as simple as marking all messages from someone, or as complex as marking only messages from someone with a particular word in the subject. In Step 2, click on the underlined words to specify the conditions you selected in step 1.
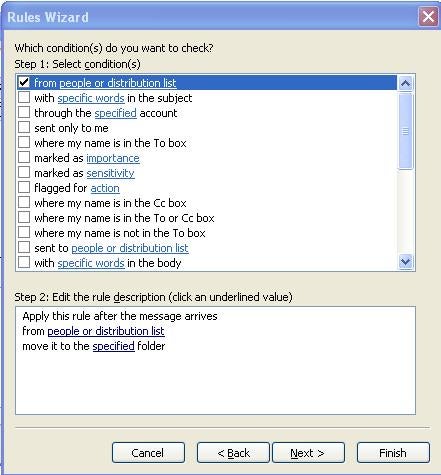
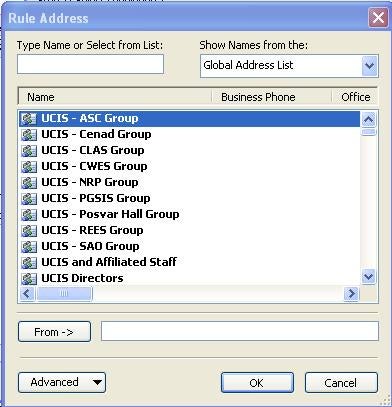
- When you click on an underlined word in Step 2, an additional window will display that allows you to specify the condition. For example, if you click on people or distribution list in the example above, you will select a person or distribution list from either the Global Address List (GAL) or your Contacts list.
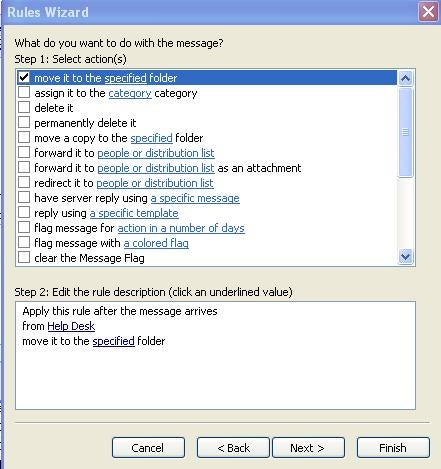
- Next, select the action for the rule. Actions can include moving the message to a folder, forwarding the message to another recipient, or deleting the message. In Step 1, put a checkmark by all actions that will apply to the rule that is being created. In Step 2, click on the underlined phrase, and select the value that is appropriate for the rule. For example, if the message is to be moved to a folder, select the folder’s name from the list or create a new folder. Click Next after you have selected your actions.
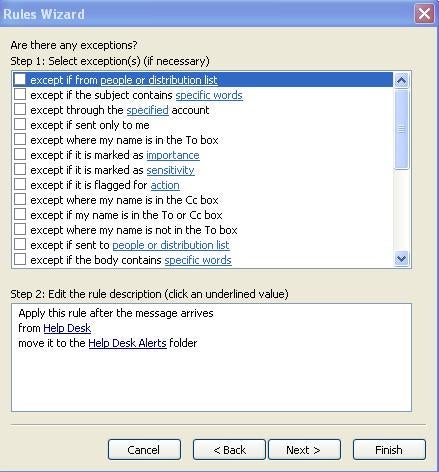
- Apply any exceptions to the rule. For example, you may want to move all emails from John Doe to the JDoe folder with an exception for those that are flagged as important. Click Next after you have selected your exceptions.
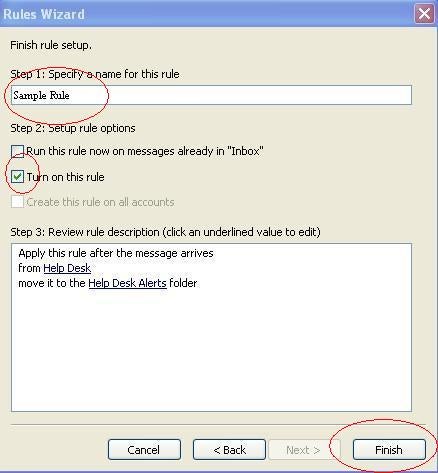
- Next, name the rule, turn it on, and review the rule description. Click Finish to save the new rule.
Edit or Delete Rules
Outlook 2003 & 2007
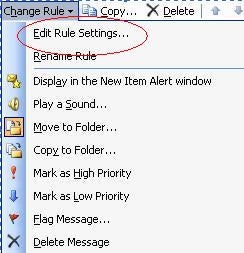
- Select Change Rule to edit a rule or Delete to delete a rule.

- If you choose Change Rule, select Edit Rule Settings to change the way your rule works.
Outlook 2010 & 2013
From the File tab, click Manage Rules & Alerts. Note: When changing rules, the settings that will appear are identical to the settings for creating a rule.
Export or Import Rules (All Versions of Outlook)
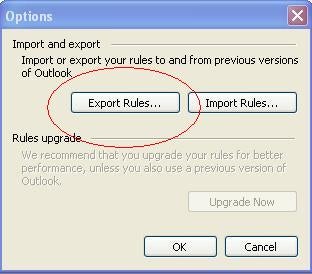
- Rules can also be exported to a file for backup purposes or imported from a previous backup. When the Rules and Alerts window is open, click on the Options button.

- Choose Export Rules to create a backup or to move rules to a new computer. Choose Import Rules to restore the rules as a backup or to a new computer.