You are here
eSignature Security Guide
Pitt IT’s eSignature Service (DocuSign) enables you to send documents for electronic signature. To help ensure that sensitive documents and University data remain protected, Pitt IT would like to share with you these important tips and considerations for using eSignature securely.
General Security Guidelines
- Always double-check the names and email address of recipients
- Always used the recipients primary email address when sending documents and envelopes to Pitt users. Alias email addresses may cause issues and should not be used with eSignature.
- Never forward eSignature notification emails that request your signature
- Only download signed forms from an adequately secured device and store them in an approved location
- Always use identity verification when sending documents containing Restricted or sensitive information
- Request a Part 11 eSignature account from Pitt IT if your documents have enhanced regulatory requirements, such as FDA 21 CFR Part 11.
FDA 21 CFR Part 11 Compliance
If you have documents or envelopes with enhanced regulatory requirements, such as FDA 21 CFR Part 11, you can request a separate DocuSign account with the Part 11 module enabled to ensure all legal and regulatory compliance obligations are met.
To request an FDA 21 CFR Part 11 compliance eSignature account, please submit a service request to the 24/7 IT Help Desk online or by calling 412-624-HELP (4357).
Recipient Privileges
When creating a new envelope or template, recipients may have the ability to assign signing responsibilities to another person or delegate by default. When working with documents containing Restricted or sensitive data, it is recommended that this ability be turned off to avoid having the documents forwarded to unintended parties.
1.Click on Advanced Options in the upper right of the create envelope window
2.Uncheck the box for Allow recipients to change the signing responsibility or assign a delegated signer
Revoke access to a document or envelope
If an unintended recipient has been added to a document or envelope, access to the document should be revoked immediately to prevent unauthorized access or disclosure of its contents.
- After logging into the eSignature service, click on the Manage tab and locate the envelope
- Click on the envelope to open its details, and then click the Correct button
- Click the trashcan icon to delete the recipient under the Add recipients section
- If prompted, click the Delete button to confirm the operation
- Click Next and the Correct button to finalize the changes
IMPORTANT: Voiding or deleting an envelope does not revoke recipients’ access and the included documents may still be visible. If you’re unsure if a document containing Restricted information may have been inappropriately accessed or viewed, immediately contact the 24/7 IT Help Desk online or by calling 412-624-HELP (4357).
Connect to OneDrive
Pitt IT Security recommends securely transferring sensitive documents to eSignature directly from Microsoft OneDrive. This avoids the need to download or otherwise copy these documents to potentially insecure devices or storage locations.
To enable direct document transfers from OneDrive, your University OneDrive account must be registered as a Document Source within eSignature.
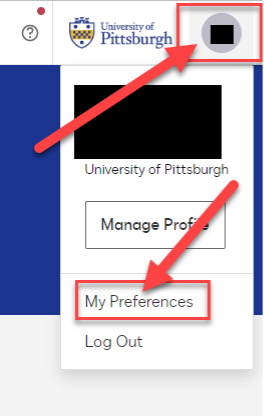
1.After logging into the eSignature service, click on your initials in the upper right corner of the window and then select My Preferences
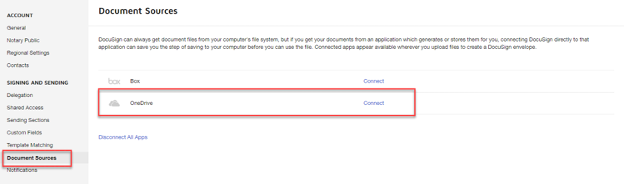
2.Under Signing and Sending, click Document Sources, and then click the Connect link next to OneDrive
3.A window will pop up asking you to log in to Microsoft OneDrive. Enter your @pitt.edu email address to be taken to the Pitt Passport login page and complete the login process
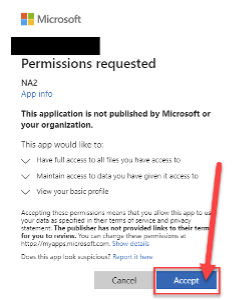
4.If this is your first time connecting eSignatue to OneDrive, you may be prompted to grant eSignature permission to access your University OneDrive account. Click the Accept button to allow eSignature to access your OneDrive documents
5.Verify that OneDrive has been successfully connected by viewing Document Sources again. The link next to OneDrive should now say Disconnect
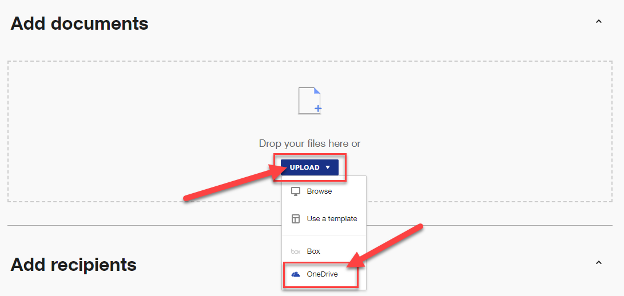
6.When creating an envelope or uploading documents to sign, you should now be able to select OneDrive from the Upload menu
IMPORTANT: Only add your University of Pittsburgh affiliated OneDrive account to the eSignature service. Personal OneDrive accounts, or those provided by another institution, should never be added as a Document Source. If you have questions, please contact the 24/7 IT Help Desk online or by calling 412-624-HELP (4357).
Identity Verification
When sending documents or envelopes via DocuSign eSignature that contain, or may contain, Restricted or sensitive information, it’s critically important to verify the identities of your recipients. This is particularly true went sending documents to recipients outside of the University.
When adding recipients to an envelope, click the Customize button for each recipient to view the available identity verification options. eSignaure provides three different methods to help verify the identity of a recipient:
- Identity Verification (SMS) (Recommended)
- Identity Verification (Phone Call)
- Access Code
Identity Verification (SMS) (Recommended)
When the recipient’s phone number is known, identity verification can be completed by SMS text message. When accessing the document, the recipient will first be taken to a security request page and must select a phone number for SMS text authentication. Clicking the Send SMS button will then send a text message containing a unique access code, which the recipient will be asked to provide before continuing.
Identity Verification (Phone Call)
Phone call verification is also available as an alternative to SMS text message verification. With this option, the recipient will be provided with a unique authentication code and receive a voice call to their phone number, where they will be prompted to enter the code.
NOTE: If the recipient’s phone number is not known, click the check box Allow recipient to provide phone number. This will prompt the user to enter their phone number to begin the identity verification process. This option is only available for Phone Call based Identity Verification.
Access Code
An access code is a unique code known only to you and the recipient. Configuring an access code will require recipients to enter the code before viewing the documents.
Tips for using access codes:
- When possible, do not use the same access code for more than one recipient. Each recipient should be configured with a unique access code to maximize security.
- Never send access codes to the same email address used to send eSignature requests. Instead, use an alternative form of communication to relay the access code, such as a phone call or SMS text message.
- Access codes can be combined with other forms of identity verification for additional security. For example, recipients can be asked to provide an access code in addition to performing identity verification via SMS text message.