Overview
This article explains how to configure your Mailman mailing list. Mailman is software used to manage electronic mail discussion and e-newsletter lists. Mailman uses a Web interface that allows you to easily configure your mailing list and select your mailing list preferences.
This document covers the basic information list administrators will need to maintain a mailing list. For more detailed information about all the available Mailman options, refer to the document titled Advanced Mailman Preferences for List Administrators. Please contact the Help Desk at 412 624-HELP (4357) to request this document.
Detail
Log In
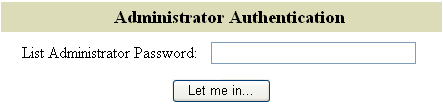
To log in to your mailing list configuration page, complete the following steps.
1. Open a Web browser to https://list.pitt.edu/mailman/admin/listname, where listname is the name of the mailing list for which you are the administrator.
2. Type your administrator password into the List Administrator Password field and click Let me in. . . .
General Options
After you have logged in, the General Options page will display by default.
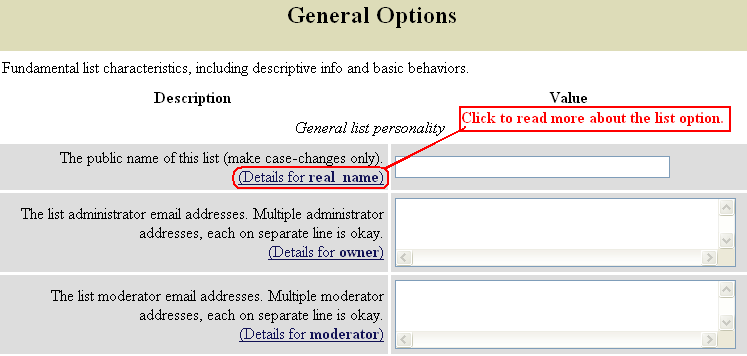
On this page, you can customize a variety of settings. After you have made your changes, you must click the Submit Your Changes button at the bottom of the page for the changes to take effect.
The following is a brief description of the most commonly used options available from this page. You can read additional details about each option by clicking the blue (Details for . . . ) link that appears below each description.
1. Public Name: This option allows you to change how the name of your list will display publicly. You can use this option to change capitalization (for example, capitalizing an acronym).
Note: Do not change the spelling of the list name. The mailing list will not function correctly if the list name is changed.
2. List Administrators: List administrators have complete control over all parameters of the mailing list. To add new administrators, enter each administrator’s email address on a separate line.
3. List Moderators: List moderators have more limited permissions than list administrators, but are allowed to process pending administration requests, dispose of held postings, and perform other functions. To add new moderators, enter each moderator’s email address on a separate line.
Note: In order to split the list ownership duties into administrators and moderators, you must provide the email addresses of the list moderators and set a separate moderator password. Refer to the Passwords section below for instructions on creating moderator passwords.
4. Identifying phrase (a terse phrase identifying this list): You can use this field to type a brief description of your list. This phrase is used when your mailing list is displayed with other mailing lists or in headers.
5. Introductory Description: This field allows you to type a longer description of your list. This description will be included at the top of the General List Information page.
6. Subject Line Prefix: This text will be added to the subject line of messages posted to the list to help distinguish mailing list messages in mailbox summaries.
7. Hide Message Sender: This option allows you to hide the sender of a message, replacing the sender’s information with the list address.
Note: You can read more details about additional options not found in this document by clicking the blue (Details for . . . ) link that appears below each description.
Passwords
Click the Passwords link at the top of the page to view the password options. The Passwords page allows you to change passwords for list administrators and list moderators. List administrators have complete control over all parameters of the mailing list. List moderators have more limited permissions than list administrators, but are allowed to perform pending administration requests, dispose of held postings, and perform other functions.
To create passwords for list administrators, type the password into the Enter new administrator password field, retype the password into the Confirm administrator password field, and then click the Submit Your Changes button.
To create passwords for list moderators, type the password into the Enter new moderator password field,retype the password into the Confirm moderator password field, and then click the Submit Your Changes button.

Note: In order to split the list ownership duties into administrators and moderators, you must set a separate moderator password and also provide the email addresses of the list moderators. Refer to item 3 in the General Options section above for instructions on providing email addresses of list moderators.
Membership Management
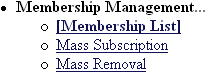
Click the Membership Management link at the top of the page to view the options for managing the memberships for your mailing list. Three sub-menus will display beneath the Membership Management link: Membership List, Mass Subscription, and Mass Removal. Each of these three menu options is described below in more detail.
Membership List
The Membership List page allows you to view and set options for each individual member of your mailing list. Click on a checkbox to select or deselect an option, then click the Submit Your Changes button to finalize your changes.
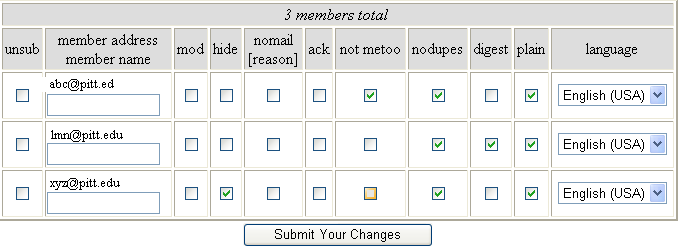
The following table describes each of the Membership List options.
Table 1: Description of Membership List Options
|
unsub
|
Click on this to unsubscribe the member.
|
ack
|
Does the member get acknowledgements of their posts?
|
|
mod
|
The user's personal moderation flag. If this is set, postings from them will be moderated, otherwise they will be approved.
|
not metoo
|
Does the member want to avoid copies of their own postings?
|
|
hide
|
Is the member's address concealed on the list of subscribers?
|
nodupes
|
Does the member want to avoid duplicates of the same message?
|
|
nomail
|
Is delivery to the member disabled? If so, an abbreviation will be given describing the reason for the disabled delivery:
|
digest
|
Does the member get messages in digests? (otherwise, the member will receive individual messages as they are posted to the list)
|
|
U
|
Delivery was disabled by the user via their personal options page.
|
plain
|
If getting digests, does the member get plain text digests? (otherwise, MIME)
|
|
A
|
Delivery was disabled by the list administrators.
|
language
|
Language preferred by the user.
|
| B |
Delivery was disabled by the system due to excessive bouncing from the member's address. |
? |
The reason for disabled delivery isn't known. This is the case for all memberships which were disabled in older versions of Mailman. |
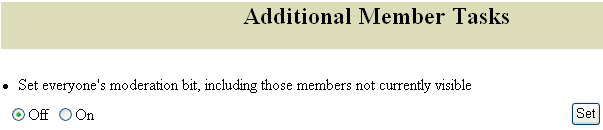
At the bottom of the Membership List page is the Additional Member Tasks window. This window allows you to set the moderation bit for the members of your list. If you select Off, each member of your list will be able to post responses. If you select On, each member of the list must be approved before they will be able to post responses.
Adding Users to a Mailing List
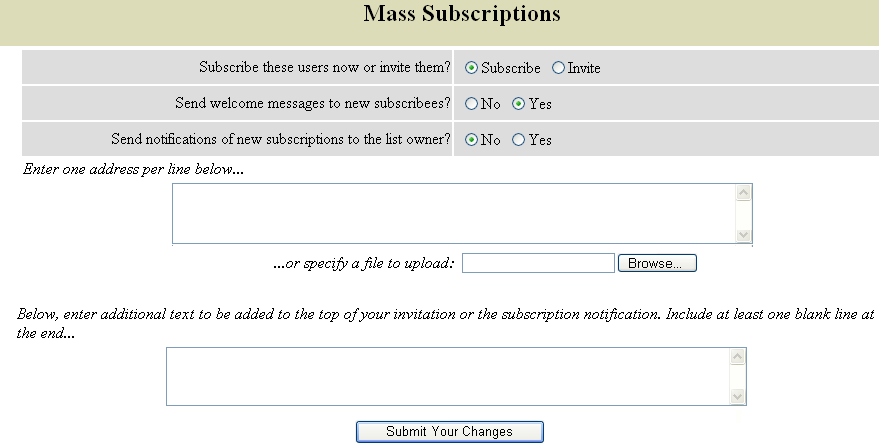
The Mass Subscription window allows you to add or invite new subscribers to your mailing list. To subscribe individuals, complete the following steps.
1. Click the button next to Subscribe or Invite to select how individuals will be subscribed. Selecting Subscribe will automatically subscribe each user that you enter in the text box (see step 4). Selecting Invite will email each user an invitation to join the mailing list. The user must then accept the invitation in order to join the list.
2. Select whether to send new subscribers a welcome message by clicking the Yes or No button. The welcome message will tell new subscribers how to post to the mailing list, where to find general information about the list, how to unsubscribe from the list, and how to change their options. The welcome message will also include a password that the subscriber must know in order to change his or her options.
3. Select whether to send notifications of new subscriptions to the list owner. Clicking Yes will email a notification to the list owner each time a new user successfully subscribes to the mailing list.
4. Type the addresses of the users you would like to subscribe in the text box Enter one address per line below. . . .
Note: You can also upload a list of email addresses to subscribe using the specify a file to upload option. Click the Browse button to locate the file containing the email addresses you wish to upload. The file must be a text-only file with each address separated by a hard return (press the Enter key after each address).
5. If you like, enter additional welcome text that will be added to the top of your invitation. Be sure to add a blank line at the end of the text so your text displays separately from the standard message.
6. Click the Submit Your Changes button to finalize your changes.
Removing Users From a Mailing List
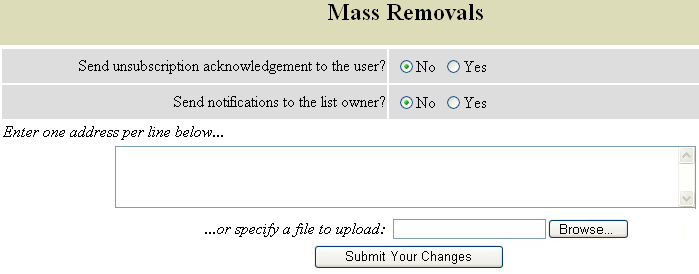
The Mass Removals window allows you to unsubscribe users from your mailing list. To unsubscribe individuals, complete the following steps.
1. Select whether to send an acknowledgement to each user by clicking Yes or No. The acknowledgement will inform the users that they have been unsubscribed from the list.
2. Select whether to send a notification to the list owner by clicking Yes or No. Clicking Yes will email a notification to the list owner when users are successfully unsubscribed from the mailing list.
3. Type the addresses of the users you would like to unsubscribe in the text box Enter one address per line below. . . .
Note: You can also upload a list of email addresses that you would like to unsubscribe using the specify a file to upload option. Click the Browse button to locate the file containing the email addresses you wish to upload. The file must be a text-only file with each address separated by a hard return (press the Enter key after each address).
General List Information Page
Click the Go to the general list information page link at the top of the page to view the General List Information page. From this page you can view a list of prior postings by clicking on the Archives link.
Note: Lists are not archived by default, and archives are also private (available to list members only) by default. To change the archiving options for your mailing list, click the Archiving Options link located at the top of the page under the Configuration Categories heading.
You can also view the subscribers to the list by typing your email address into the Address field, typing your mailing list password into the Password field, and clicking on the Visit Subscriber List button.
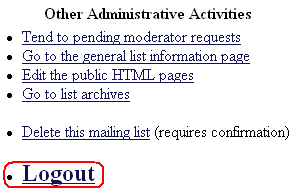
Log Out
To log out of your mailing list configuration page, click the Logout button. The Logout button is located at the top of the page under Other Administrative Activities.