Overview
Did you know you can publish your own personal website here at Pitt? The first step is to create your webpages using Hypertext Markup Language (HTML). More information about HTML can be found in the Help with HTML help sheet. Next, you need to upload those pages to a location where others can view them. This document explains how to do so.
All students, faculty, and staff at Pitt have access to a public folder on the Andrew File System (AFS) that can be used to host personal websites. AFS is a distributed network file system. It enables you to store files on remote servers and access those files as easily as if they were stored locally on your computer. You can use a computer at any remote site (for example, while at home) to access files you have stored on AFS. Make sure you name your HTML page index.htm or index.html so that others are able to view it on AFS.
Note: Website hosting for departments is available through the Enterprise Web Hosting service provided by Pitt Information Technology.
After you upload your personal webpages to AFS, anyone can view your website at
http://sites.pitt.edu/~username
(where username is your University Computing Account username). For example, if your University Computing Account username were jdoe, you would view your website at
http://sites.pitt.edu/~jdoe
Detail
To get started, you need to connect your Windows, Mac, or Linux computer securely to AFS through secure file transfer protocol (SFTP) and create an HTML directory. SFTP enables you to transfer files securely between two computers.
Creating an HTML Directory on AFS (Windows)
Before you can make your webpages publicly available, you will need to set up a web directory in your AFS space so that web browsers can access your files. A program called WinSCP can be used to establish an SFTP connection (Note: other SFTP clients can also be used, such as FileZilla).
If you are connecting to linux-ts.it.pitt.edu from outside PittNet, use of PittNet VPN (GlobalProtect) is required.
1. If you do not already have WinSCP on your computer, you can download it at http://winscp.net/eng/index.php.
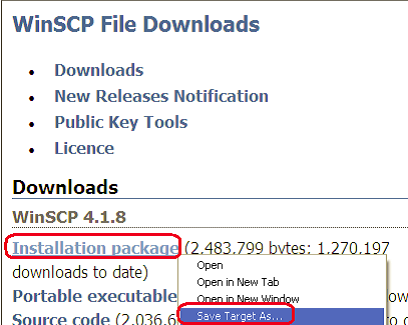
2. You will be taken to the WinSCP site to complete the download process. Right click the Installation package link in the Downloads section and select Save Target As. Save the setup file to your desktop, then double-click it and follow all instructions to complete the installation.
Notes:
a. You may have a different version of WinSCP than the one shown in the following image.
b. A security warning may display if you run the software. Click Run.
c. A setup wizard will guide you through the installation process. Select the Typical installation and Commander Interface options if prompted by the setup wizard.
3. Double-click the WinSCP icon on your desktop to open the program.

2. The WinSCP Login window will display. Enter linux-ts.it.pitt.edu in the Host name field. Enter your University Computing Account username and password where prompted. Ensure the Port number set to 22 and that the File protocol is set to SFTP and click Save.
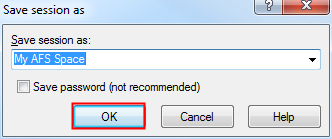
4. Enter a name for your saved session (for example, My AFS Space) and click OK.
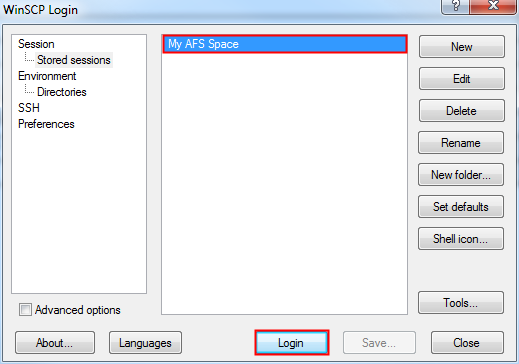
5. Select your My AFS Space session and click Login.
Note: The next time that you use WinSCP, you can simply select your stored session and click Login. You do not have to enter the Host Name each time.
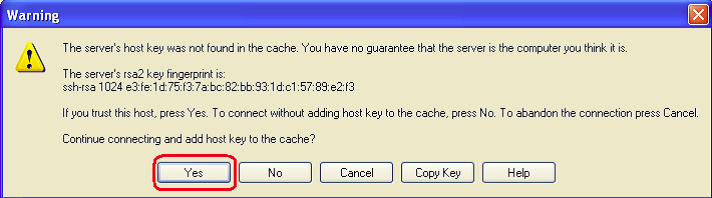
6. The first time that you use WinSCP, you may see a Warning window below. Click Yes to add the host key to the cache. This warning should not display again.
7. If you see additional server prompts while connecting, click OK at each prompt. You are now securely connected and can copy files between your computer (left side of window) and the remote system (right side of window).
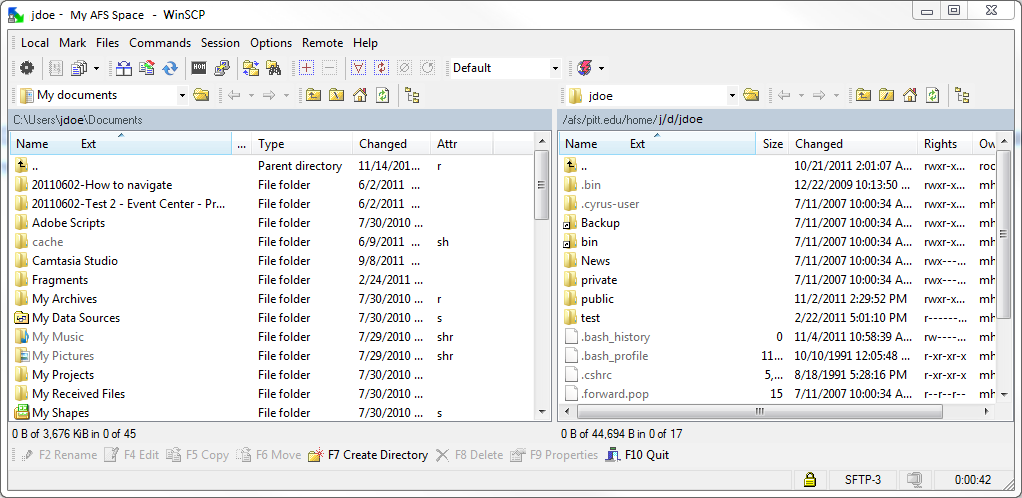
8. On the right-hand side, double-click the public folder.
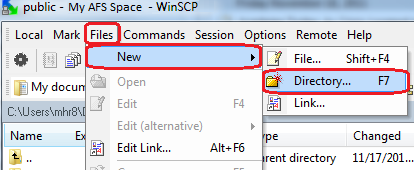
9. To create your html folder, click Files, select New, and click Directory.
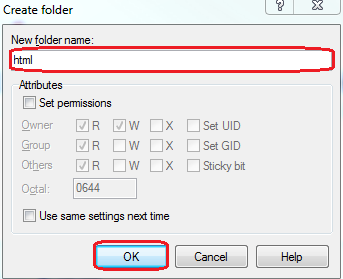
10. For the New folder name, type html, then click OK.
11. From the left-hand side of the window, open the folder that contains the files for your website. From the right-hand side, double-click the public folder, then double-click the html folder. Select the files and drag them to the right-hand side of the window until a ‘+’ sign appears in the remote folder, then release the mouse button.
Important: Make sure you name your HTML page index.htm or index.html so that others are able to view it.

12. The files that you place in the html folder, as well as any subdirectories that you create within the public/html directory, will be accessible over the web. You can view them at http://sites.pitt.edu/~username (where username is your University Computing Account username).
13. When you are finished, click Session, select Disconnect, then click Close.
Creating an HTML Directory on AFS (Mac)
Before you can make your webpages publicly available, you will need to set up a web directory in your My AFS Space so that the web servers can access your files. Macs can use an SFTP program called Fetch, which can be downloaded using the Software Download Service at My Pitt (my.pitt.edu).
If you are connecting to linux-ts.it.pitt.edu from outside PittNet, use of PittNet VPN (GlobalProtect) is required.
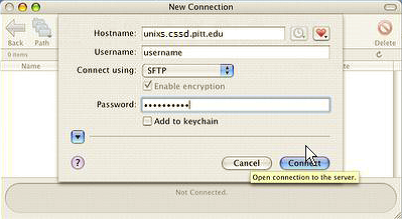
1. Go to the Applications folder and double-click the Fetch icon to launch the program. A New Connection window will display.
2. In the Hostname field, type linux-ts.it.pitt.edu.
3. In the Username field, type your University Computing Account username.
4. Set the Connect using drop-down menu to SFTP.
5. In the Password field, type your University Computing Account password.
6. Click the Connect button.
7. When you have successfully connected, files on the remote system will appear in the window as shown below. Double-click the public folder.

8. To create an html folder, click the New Folder button in the menu. In the Enter a name for the new folder: field, enter html. Click OK.

9. To begin uploading files to the remote system from your local system, double-click the html folder. Select the file(s) on the local machine and drag these file(s) to the html folder. Release the mouse button when you see a green plus (‘+’) sign.
Important: Make sure you name your HTML page index.htm or index.html so that others are able to view it.
10. The file(s) will be uploaded. The files that you place in the html folder, as well as any subdirectories that you create within the public/html directory, will be accessible over the web. You can view them at http://sites.pitt.edu/~username (where username is your University Computing Account username).
11. When you have completed your file transfer and you are ready to disconnect from the remote system, close the connection window.
Creating an HTML Directory on AFS (Linux)
Before you can make your webpages publicly available, you will need to set up a web directory in your My AFS Space so that the web servers can access your files. You can use gFTP to do this.
If you are connecting to linux-ts.it.pitt.edu from outside PittNet, use of PittNet VPN (GlobalProtect) is required.
1. If your Linux system does not include gFTP, it can be downloaded at no cost at http://gftp.seul.org/.
2. After logging in to the Linux workstation, select Applications, then Internet, then gFTP. The gFTP window will display.
3. In the Host field, enter linux-ts.it.pitt.edu. In the Port field, select 22. Enter your University Computing Account username in the User field and your password in the Pass field. Make certain that SSH2 is selected to the right of the Pass field.
4. Click the Connect button in the upper left-hand corner.

5. You are now securely connected to AFS and can copy files back and forth between your computer and the remote system using the arrow buttons that are located between the two columns.
6. On the right-hand side of the window, locate and double-click the public folder.
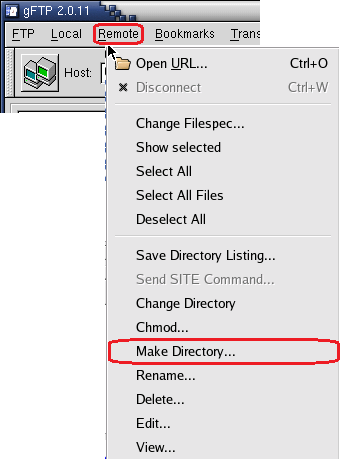
7. From the menu bar, click Remote, then select Make Directory….
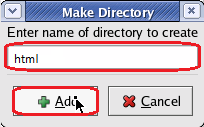
8. In Enter name of directory to create, type html, then click +Add.
9. Select the files you wish to transfer in the left-hand side of the window, then click the arrow pointing to the right-hand side. The files will be copied to the remote location.
Important: Make sure you name your HTML page index.htm or index.html so that others are able to view it.

10. The files that you place in the html folder, as well as any subdirectories that you create within the public/html directory, will be accessible over the web. You can view them at http://sites.pitt.edu/~username (where username is your University Computing Account username).
11. To end your session, click on Remote and select Disconnect (or hit Ctrl + D). Then close the gFTP client window.